【TensorFlow】WindowsにTensorFlowをインストールする方法を紹介します!
TensorFlow(テンソルフロー)をWindowsでインストールしてVisualStudio2022から利用する方法を紹介します。GPU対応のWindows用のTensorFlowは2.11未満のバージョンのみサポートされているため、今回インストールするバージョンは2.10.1になります。
| 名称 | バージョン |
|---|---|
| Windows | 10 |
| Visual Studio | Community 2022 |
| TensorFlow | 2.10.1 |
TensorFlow公式のインストール方法を参考にしています。
pipを使用してTensorFlowをインストールします
Windowsの準備
TensorFlowをインストールする前にMicrosoft Visual C++ 再頒布可能パッケージのインストールとWin32の長いパスを有効にします。
Microsoft Visual C++ 再頒布可能パッケージ
Microsoft Visual C++ 再頒布可能パッケージがインストールされているか確認します。コントロールパネル > アプリと機能 で確認できます。
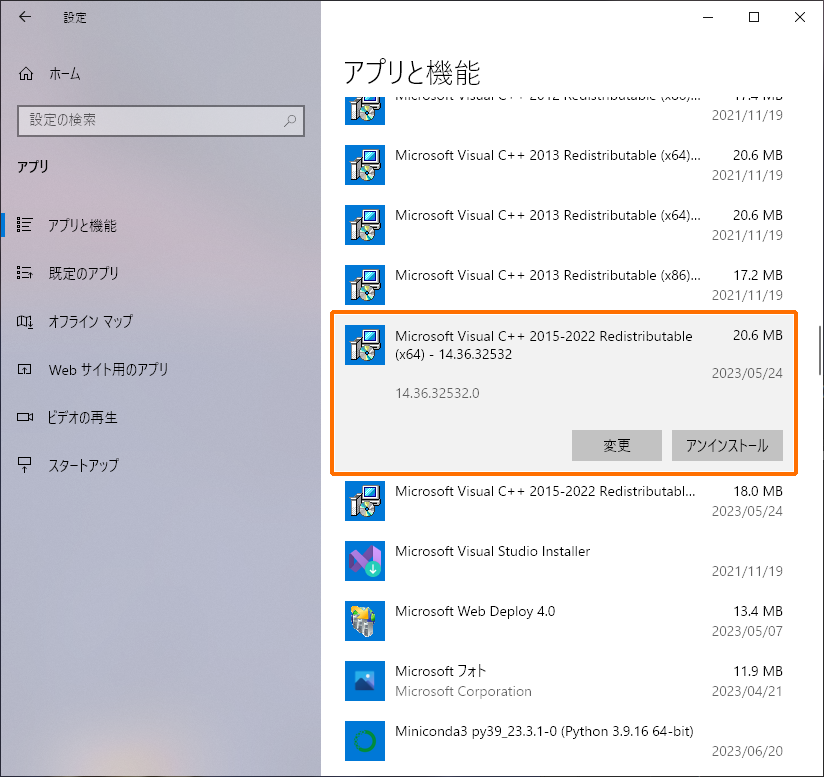
インストールされていない場合は こちら からダウンロードしてインストールしてください。
Win32の長いパスの有効
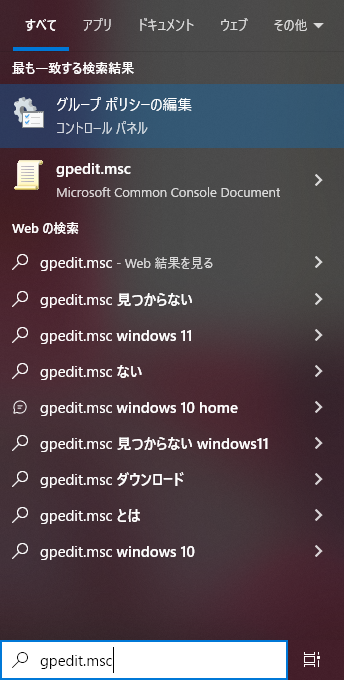
ローカルグループポリシーエディターでWin32の長いパスを有効にします。Windowsの検索フィールドにgpedit.mscと打ってグループポリシーの編集からローカルグループポリシーエディターを起動します。
コンピューターの構成 > 管理用テンプレート > システム > ファイルシステム の Win32の長いパスを有効にする 項目が有効かどうか確認します。
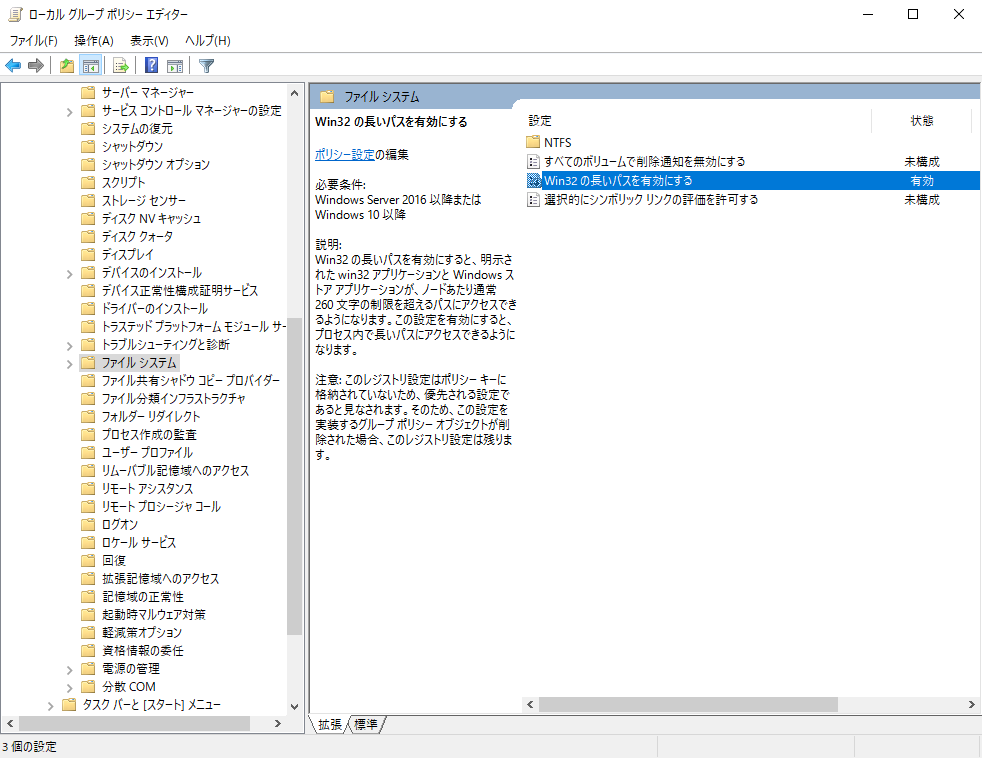
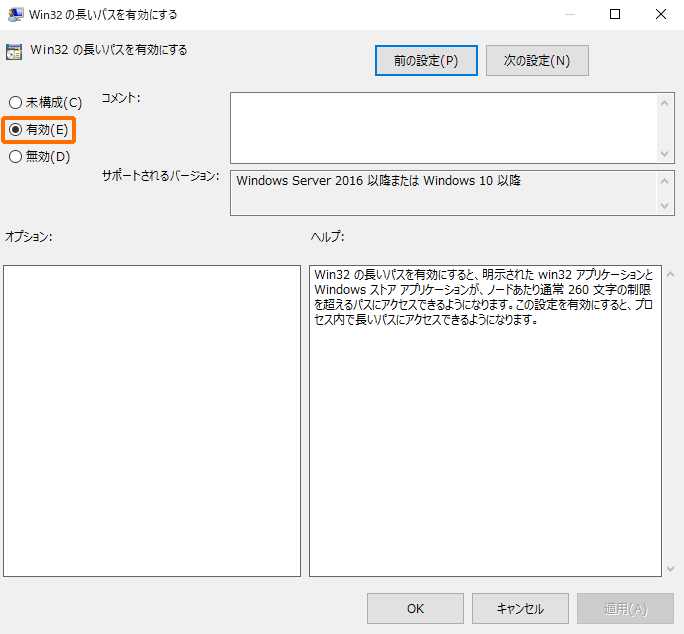
無効になっている場合はダブルクリックしてWin32の長いパスを有効化します。
以上でWindowsの準備は終了です。
Minicondaのセットアップ
GPUのセットアップを簡単にするためにMinicondaをインストールしてConda環境を構築します。
Minicondaのインストール
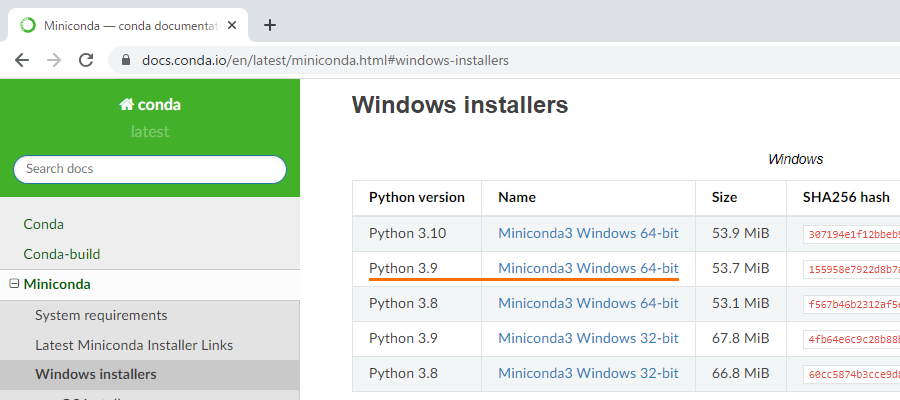
こちら からPython3.9のWindowsインストーラーをダウンロードしてインストールします。
Conda環境の作成
Anaconda Powershell Prompt (miniconda3)を起動してConda環境を作成します。pythonのバージョンは3.9を指定して下さい。
conda create --name tf python=3.9
作成した環境をアクティベートします。
conda activate tf
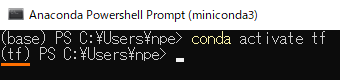
(base)から(tf)へ移行したことを確認して下さい。
CUDAのセットアップ
GPU対応するためにCUDAをインストールします。
conda install -c conda-forge cudatoolkit=11.2 cudnn=8.1.0
Tensorflowのインストール
TensorFlowはpipでインストールします。最初にpipを最新版にアップグレードします。
python -m pip install --upgrade pip
TensorFlow 2.10.1 をインストールします。
pip install tensorflow==2.10.1
※補足
バージョンを指定しないでpipを実行するとインストール可能なバージョンが表示されます。
pip install tensorflow==

インストールの確認
TensorFlowがインストールされたかバージョンを表示して確認します。
python -c "import tensorflow as tf;print(tf.__version__)"
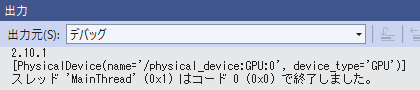
2.10.1と表示されることを確認して下さい。
続いてGPUに対応できているか確認します。
python -c "import tensorflow as tf;print(tf.config.list_physical_devices('GPU'))"
PhysicalDevice GPUと表示されていることを確認して下さい。
GPUの設定に失敗していると空配列[]が返されます。
VisualStudioからTensorFlowを利用する
VisualStudioInstallerを起動してPython開発環境をインストールしていない場合はインストールします。

適当なPythonアプリケーションプロジェクトを作成します。
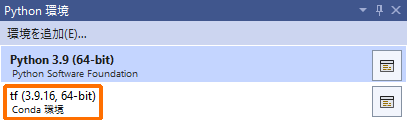
メニューから 表示(V) > その他のウィンドウ(E) > Python 環境(E) でPython環境ウィンドウを開き、Condaで作成した環境が表示されていることを確認します。
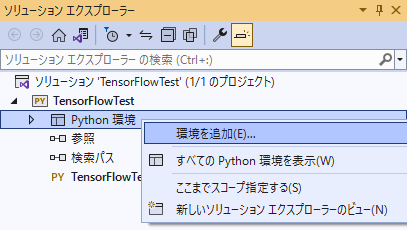
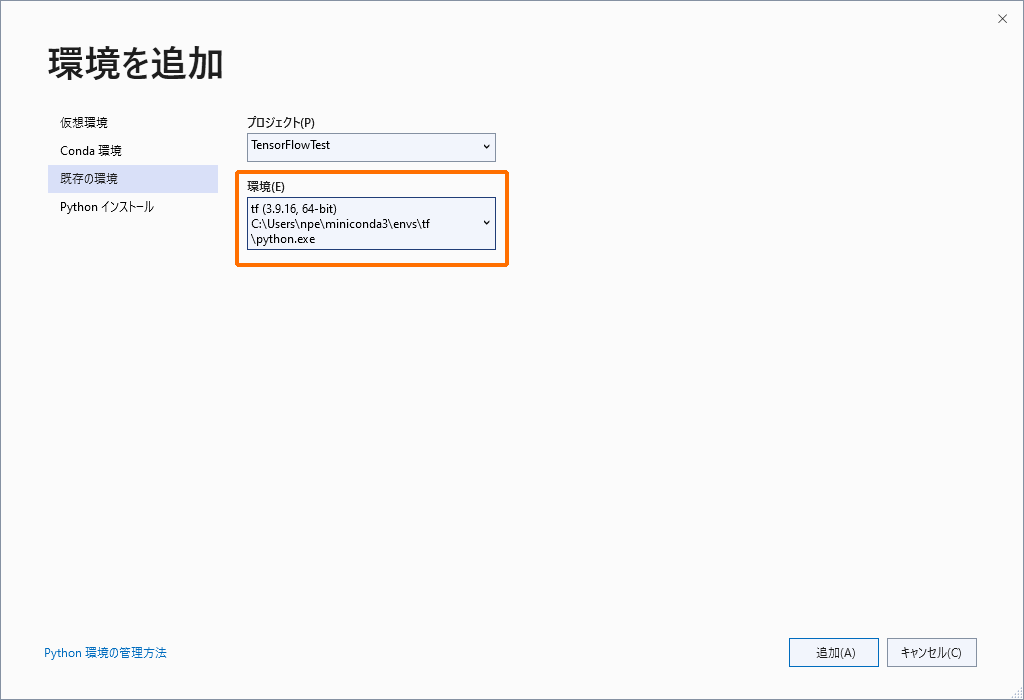
プロジェクト内のPython環境を右クリックして環境を追加...を選択します。
既存の環境タブの環境を作成したConda環境に設定します。
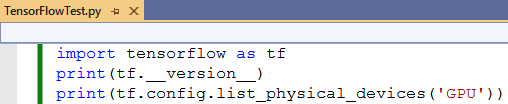
テストコードを追加します。
実行して出力を確認して下さい。
VisualStudioからTensorFlowを利用する方法を紹介しました。
機械学習には膨大な時間がかかるため最新版よりもGPU対応版を優先しましょう。
関連ページ
こちらのページも合わせてご覧下さい。